Blackberry Picking and Jam
I found a treasure trove of blackberries just outside my apartment, and decided to turn them into jam.
It started when I came back from a run on a sunny afternoon. While stretching against the garden fence, I noticed plump, black berries hanging just within reach. Beyond the fence, an entire forest of brambles stretched across the field. In that moment, I knew I had to try making jam for the first time.
Picking Blackberries
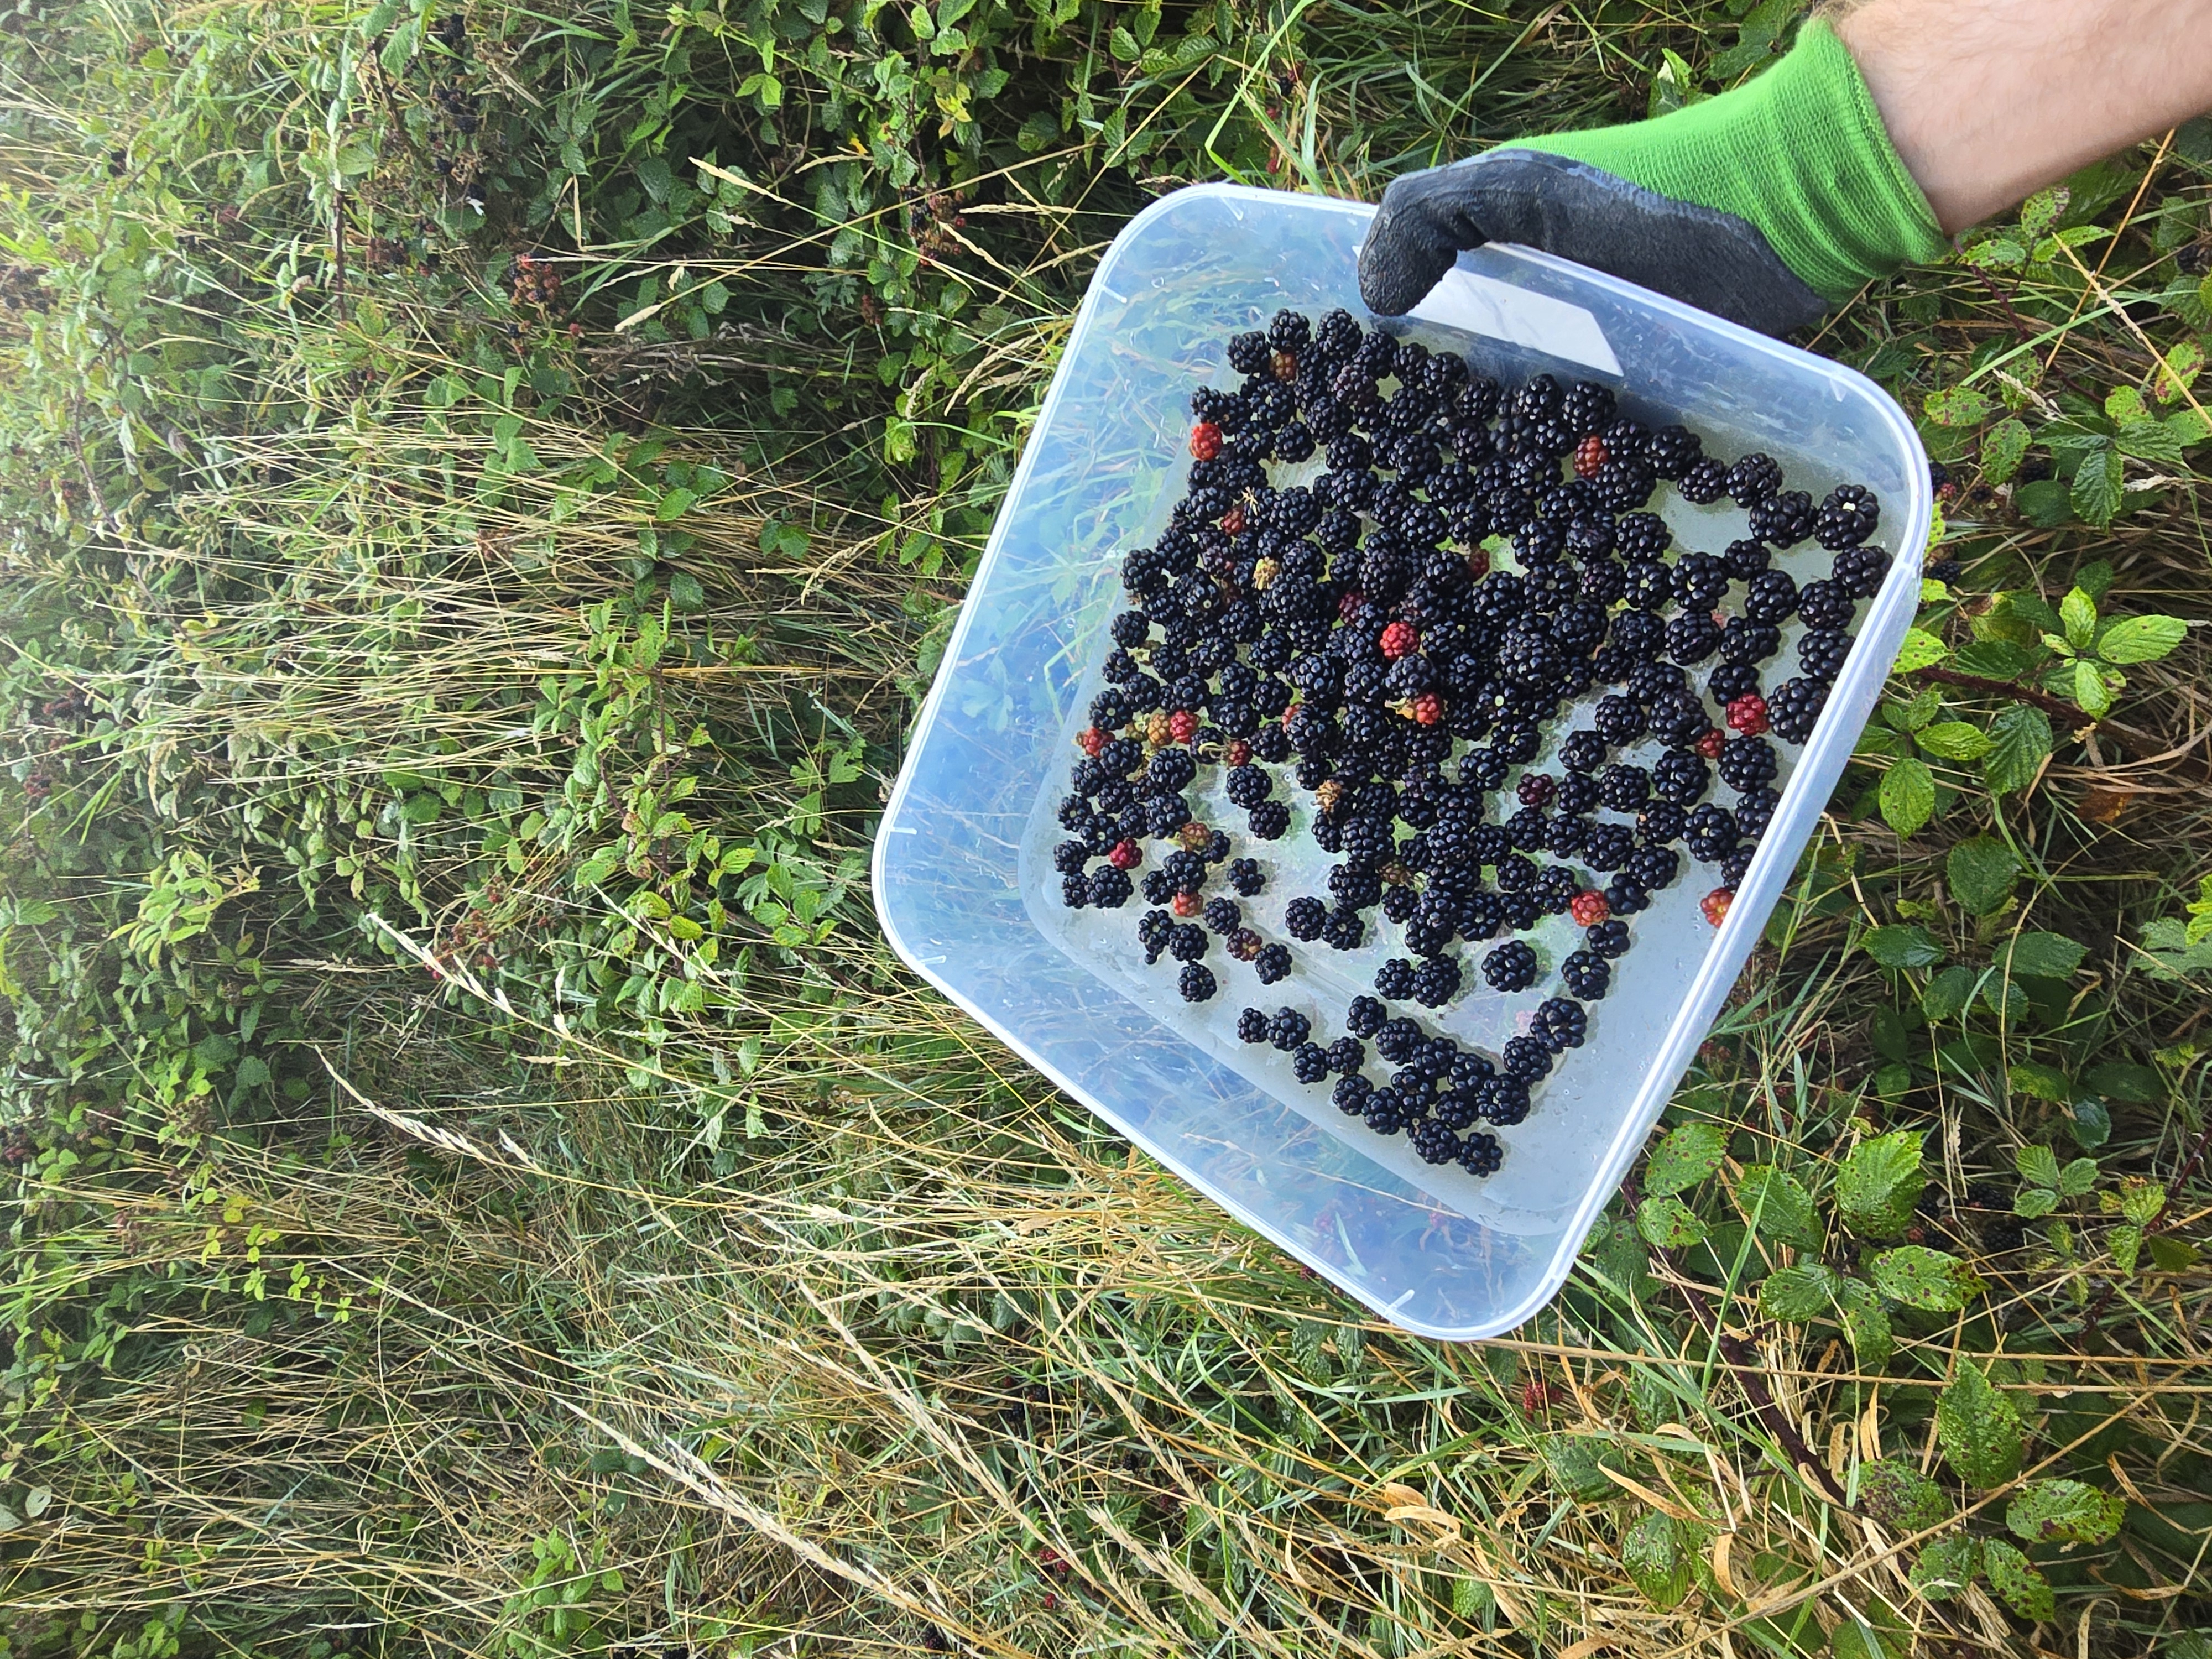
The next morning was a Sunday, quiet and warm. I walked down to the entrance of the field, wearing my wellies, waterproofs and gloves. I had never entered this field before; it was an untamed jungle of long grasses and nettles. But most importantly bramble! It was everywhere, as far as I could see, in shades of purple, red, and pink.
I felt a connection to my ancestors as I walked along picking berries, a mix of ripe and unripe. Yes you heard me right unripe as well. It's important to pick some red, unripe berries for the natural thickening agent they contain: pectin.
Blackberry picking also teaches you a few life lessons. Often the best berries are just out of reach, and you have to risk a prick from a thorn to taste the sweetest and juiciest fruit. To me, it's a reminder that reward often comes with sacrifice, and sometimes a little pain leads to something worthwhile.
I ended up filling a plastic container with berries, while making sure to leave plenty behind for the wildlife that depends on them. Feeling content with my harvest, I headed home to make jam.
Seamus Heaney, one of Ireland's greatest poets, wrote about his childhood memories of blackberry picking. His words capture the joy and melancholy of the season beautifully. I recommend giving it a read: Blackberry-Picking. I love the line "With thorn pricks, our palms sticky as Bluebeard's".
Armed with my haul, I set about turning them into something that would last.

Making the Jam
Before you begin, there are a few things to keep in mind.
You'll need jars, and they must be sterilised. Proper preserving jars are best if you want jam that lasts on the shelf, but I used small glass clip jars and stored them in the fridge. To sterilise, place the jars (without rubber rings) in the oven at 170 °C until you're ready to fill them. Simmer the rubber rings separately in a small pot of water.
Sugar is the preserving agent. I used slightly less sugar than usual, which means my jam won't last as long. You can adjust the sugar depending on how sweet you like your jam.
Pectin, the natural thickener, comes from the unripe berries. Without enough, your jam won't set. I used a ratio of 3 parts ripe berries to 1 part unripe. If you don't have unripe fruit, you can add pectin sachets instead.
Finally, lemon juice balances the flavour and adds a touch of acidity.
The Recipe
This recipe is based on the berries I collected, about 1.8 kg in total. I split the batch in half to avoid overfilling the pot.
Ingredients
- 900 g berries (about half of what fits comfortably in your pot)
- 450–500 g sugar (half the weight of berries for a good set + storage life)
- Juice of 1 lemon
That'll give you ~3–4 medium jars per batch.
Approximate Cooking Time: 30-45 Minutes
Fridge Life: 1-2 Months
Process
Preparation
- Berries: Remove leaves, stems, and any little creatures. Rinse lightly.
- Storage: If not cooking right away, spread on a tray, cover loosely, and refrigerate. Freeze any extra.
- Jars: Wash in hot soapy water, sterilise in the oven at 170 °C for 15 minutes, and keep hot until needed. Simmer rubber seals in a small pot of water.
- Test plate: Place a small plate in the freezer.
Step 1 – Soften the fruit
- Put your berries + lemon juice in the pot.
- Medium heat → let them release juice and soften (about 10 minutes).
- Stir now and then, gently mashing as they break down.
Step 2 – Dissolve the sugar
- Add your sugar, stir well.
- Keep on medium heat until the sugar crystals are fully dissolved (no gritty feeling on the spoon).
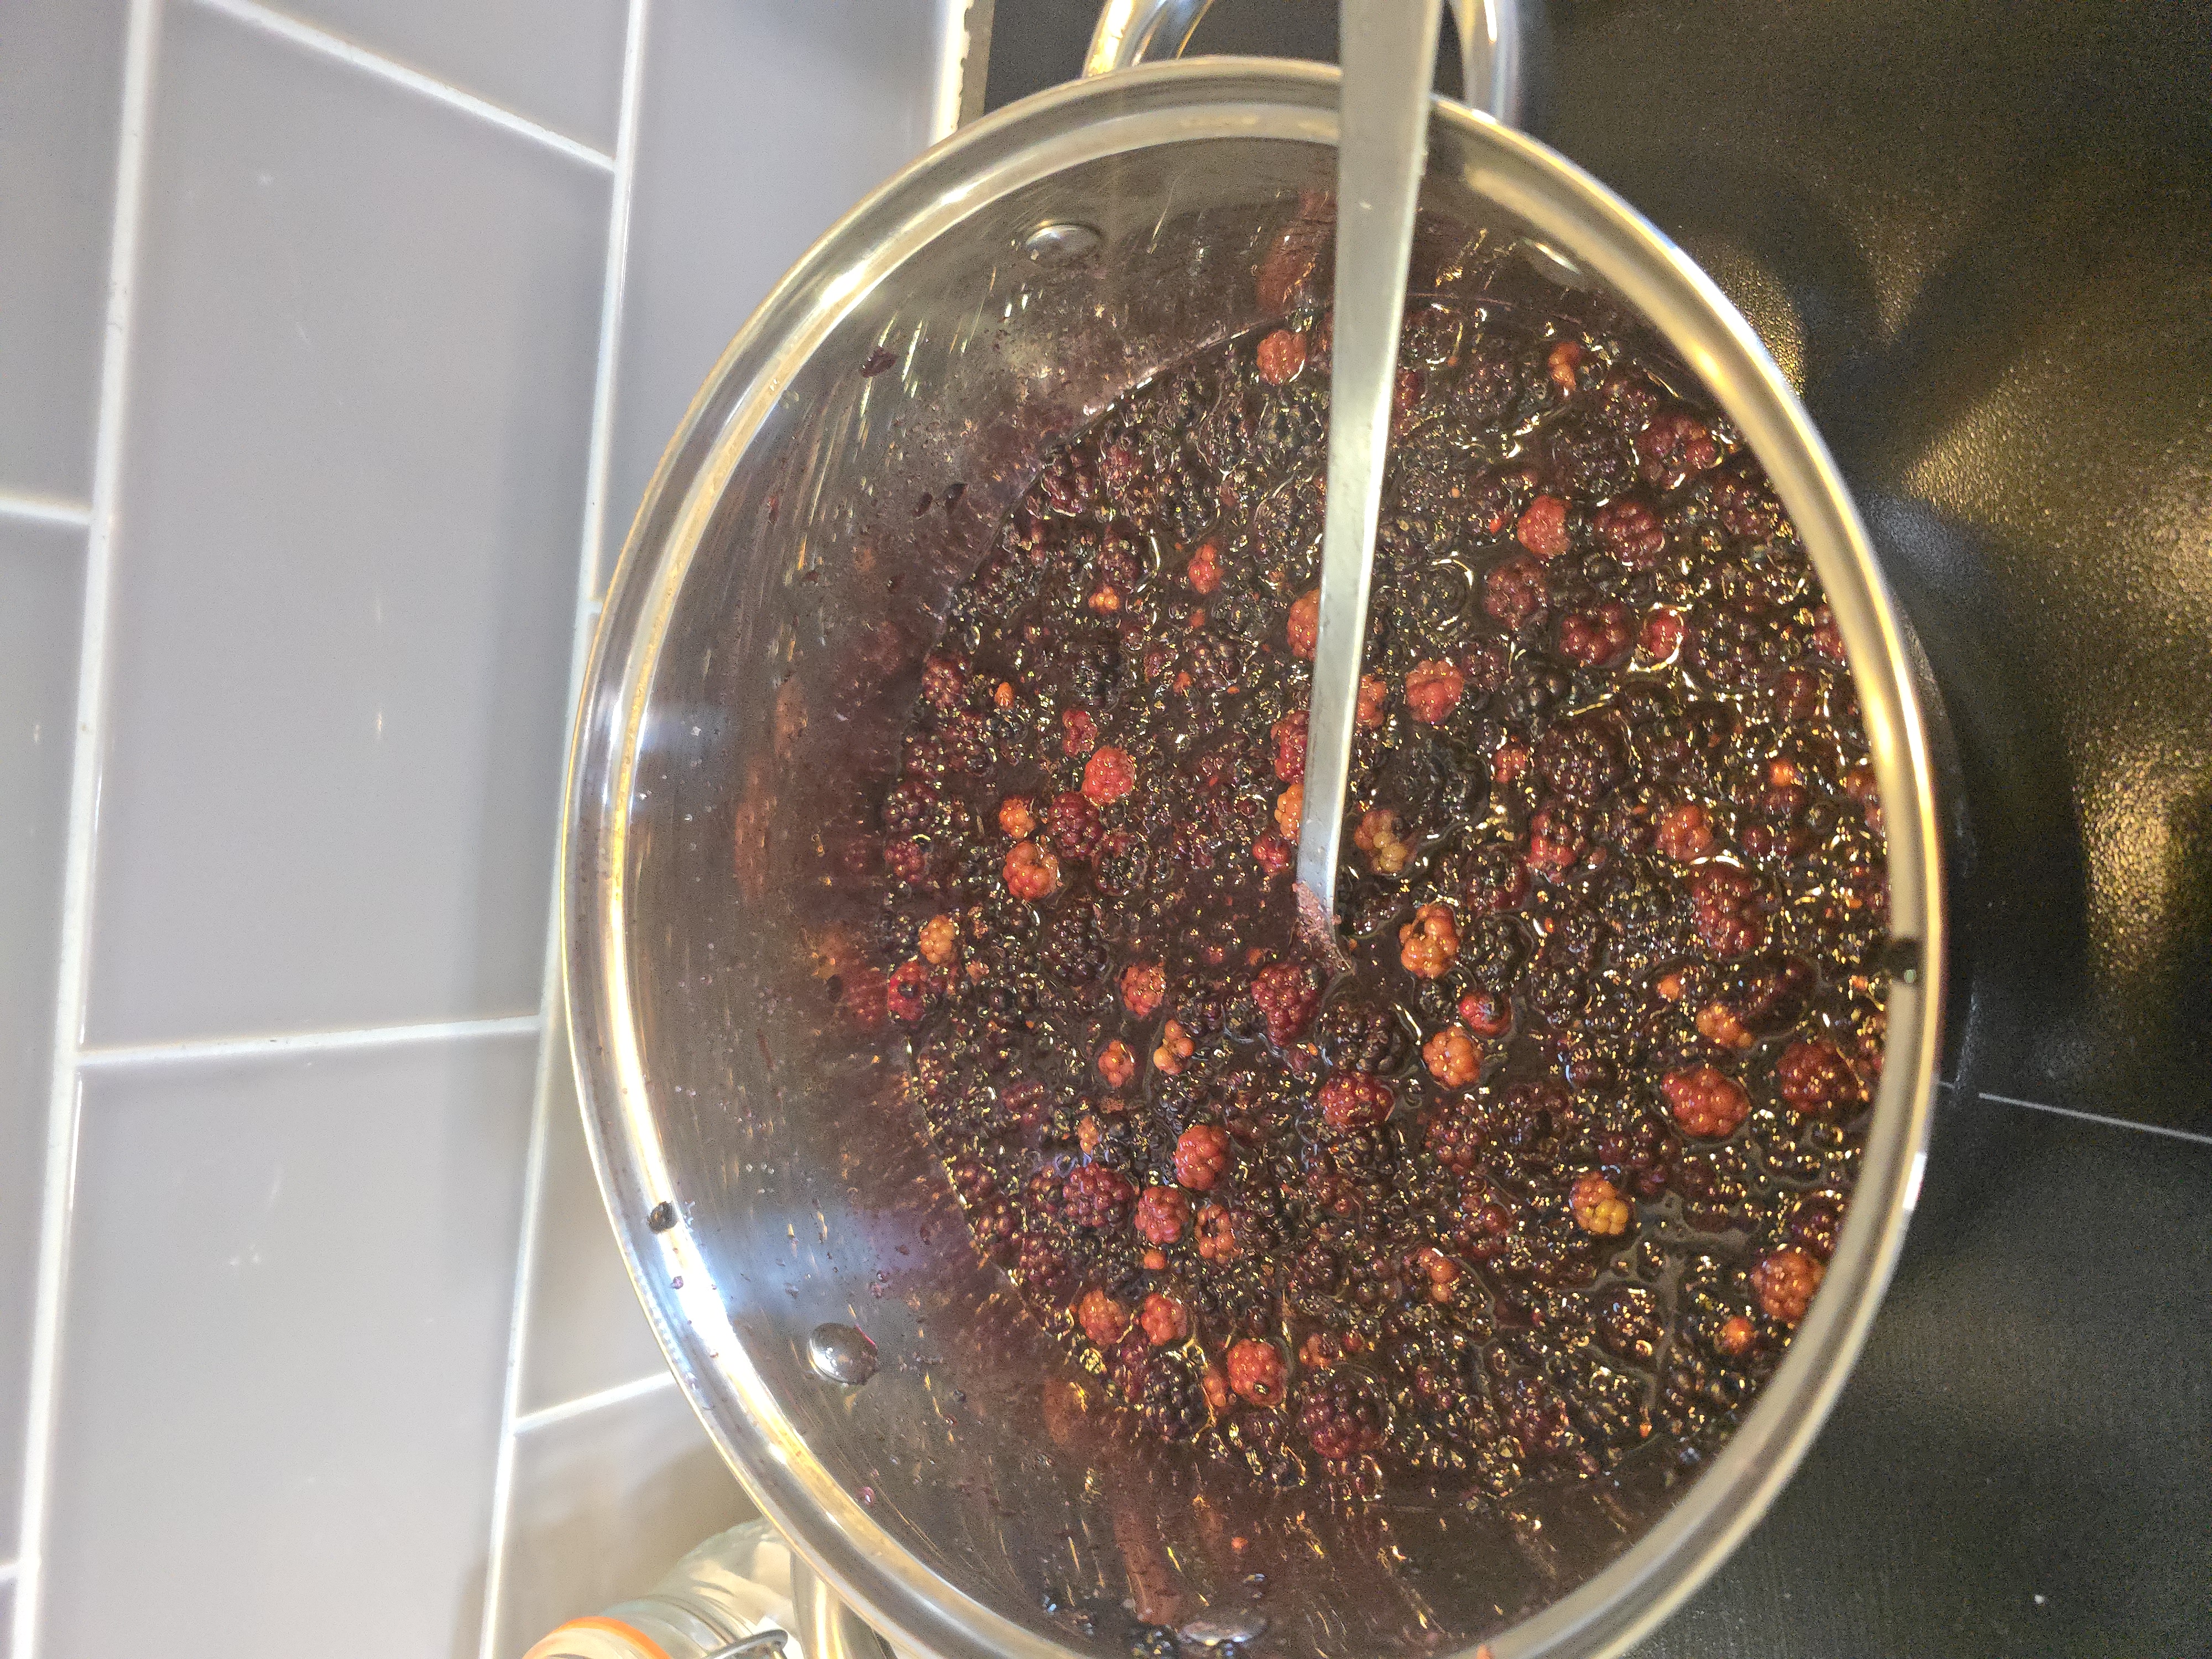
Step 3 – Rolling boil
- Once sugar is dissolved, turn up to medium-high / high until the jam is at a rolling boil (big, fast bubbles across the whole surface that don't stop when you stir).
- This is the stage you need for the jam to set.
- Keep it there for 10–15 minutes, stirring often to stop it catching.
💡 Heat Setting for Induction
On induction, that usually means about 6–7 out of 9 on the heat scale. Not the absolute max, but high enough for a vigorous boil.
Step 4 – Test & finish
- After 10 mins of rolling boil, test on your cold plate.
- Wrinkle when pushed = ready.
- Still runny = boil another 3–5 mins, retest.
- If not set yet, keep boiling in 3–5 min bursts and re-test.
- The set will firm up more as it cools, so don't over-boil if unsure.
⚠️ Watch the Heat!
Watch closely on induction. It can switch from simmer to volcano in seconds. If it starts foaming up towards the rim, just lift the pot off the hob for a few seconds to calm it, then set back down.
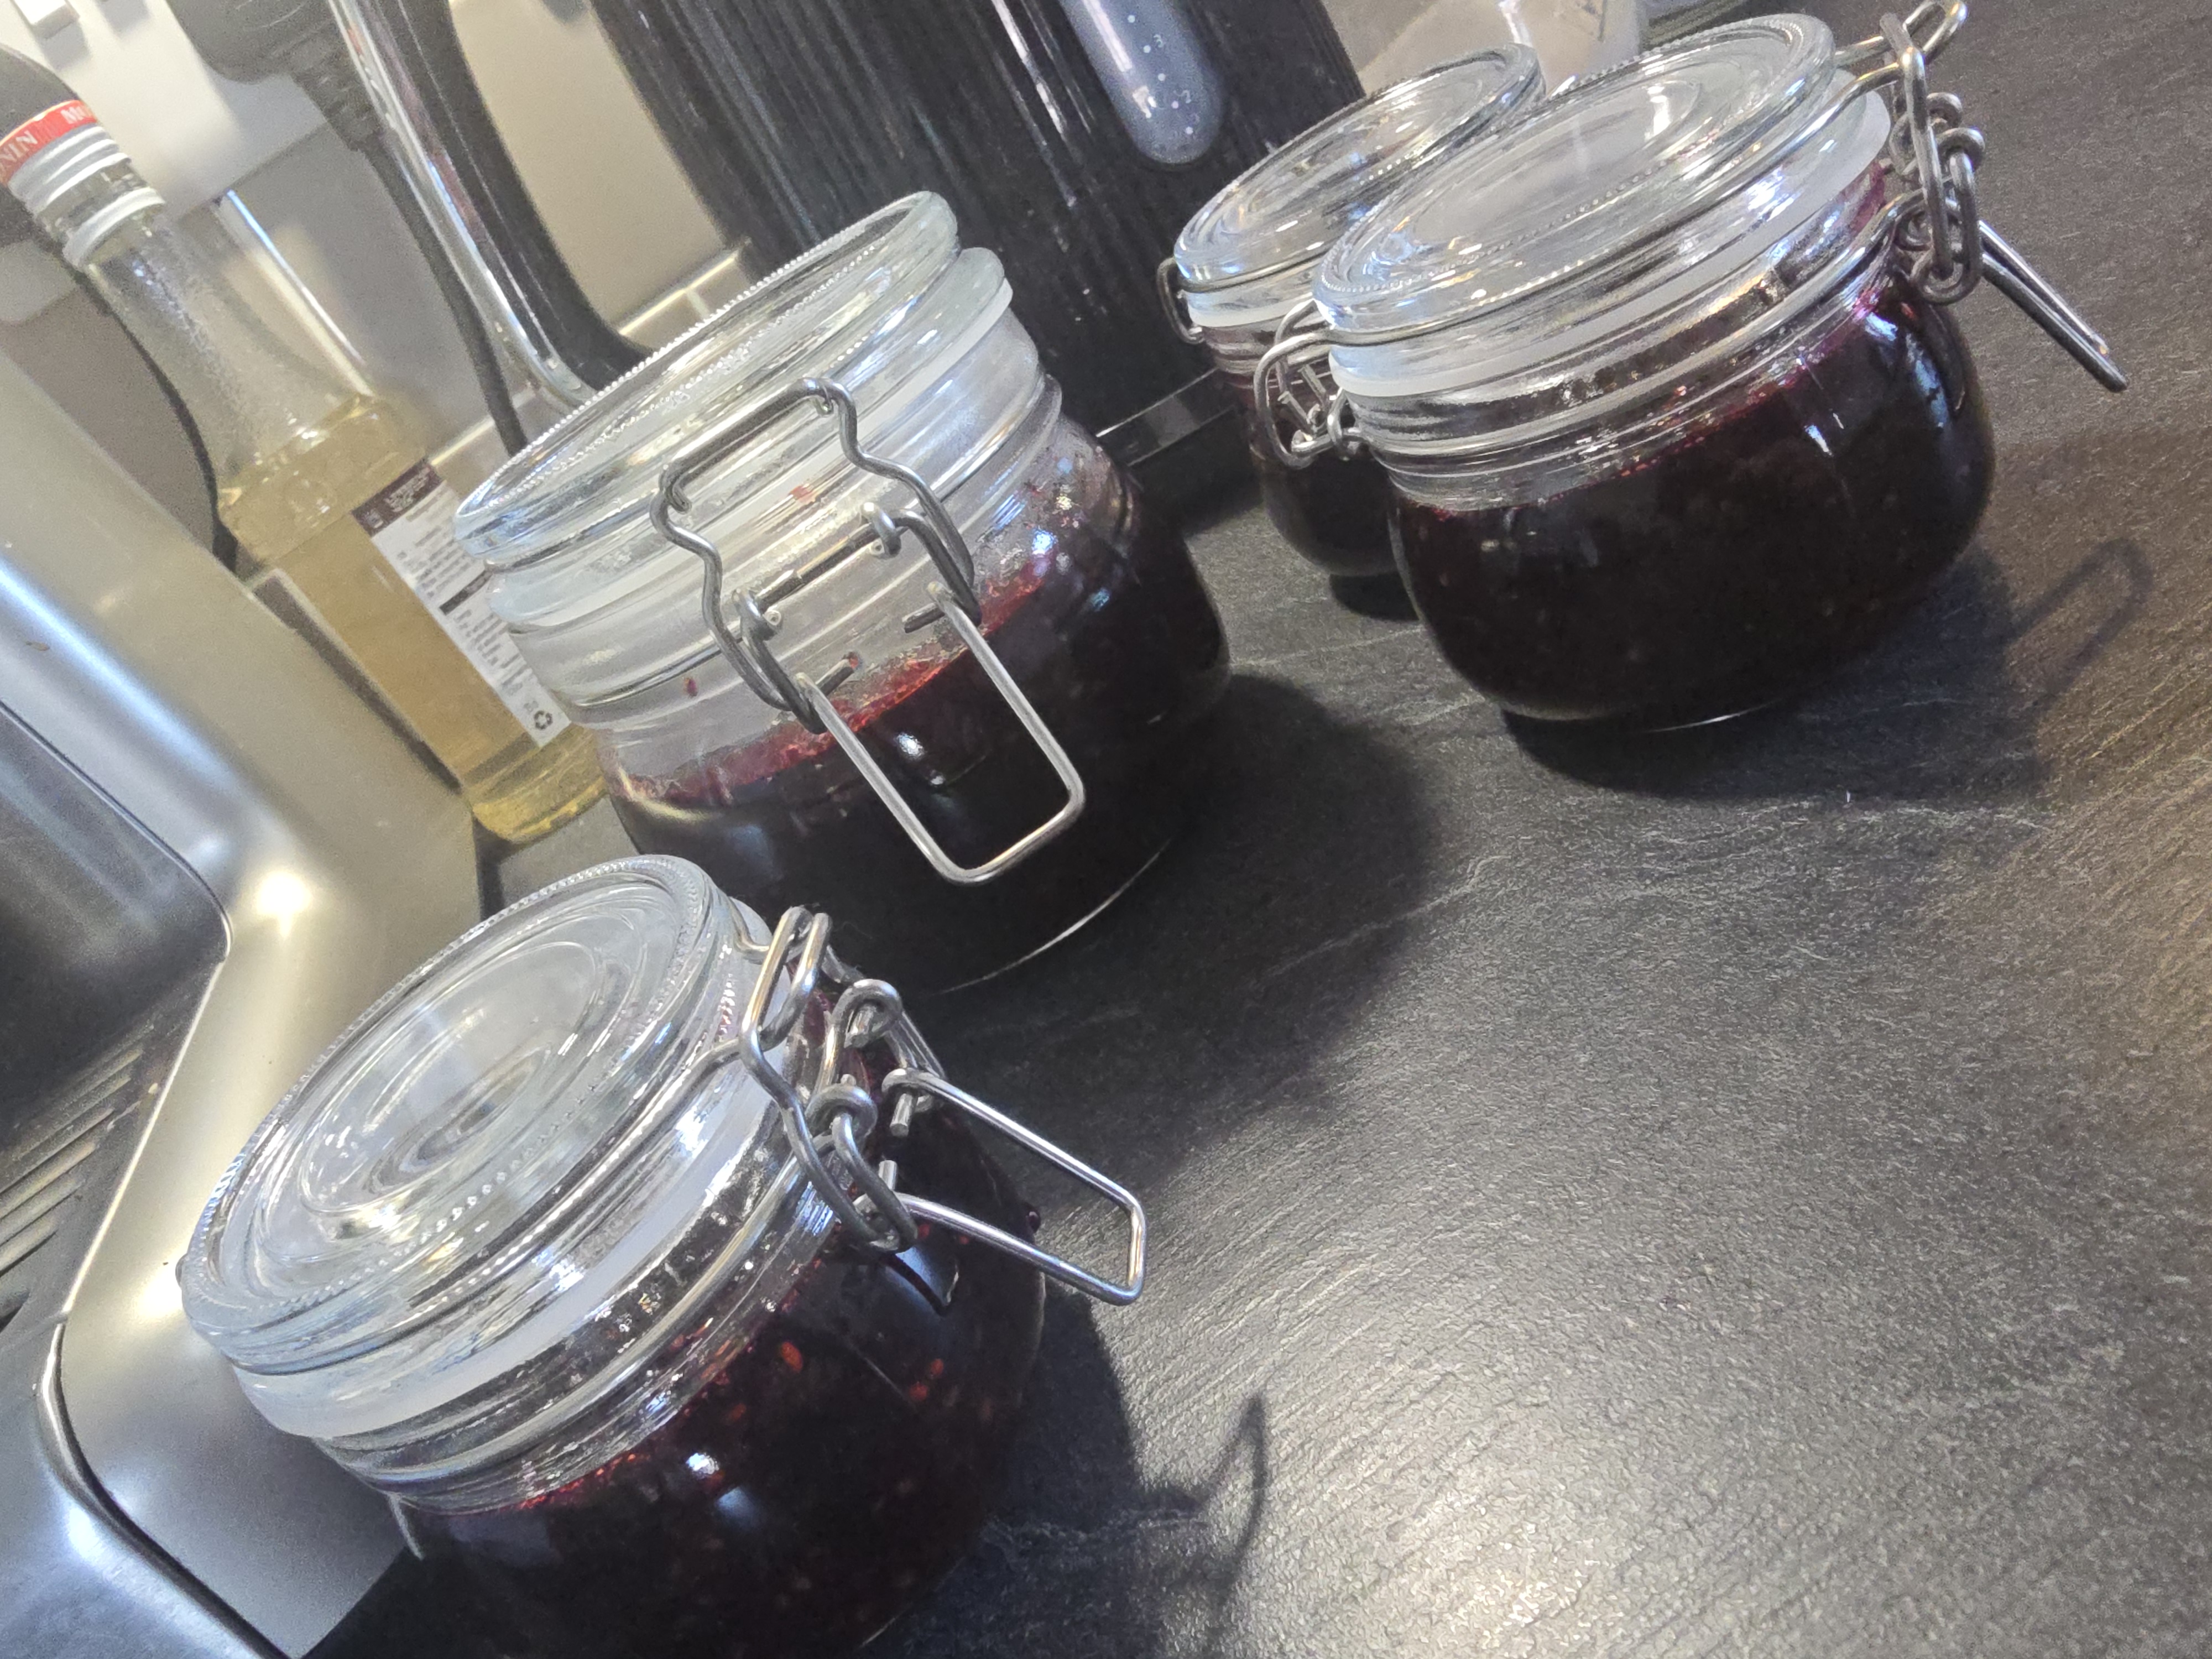
Step 5 – Jar
- While jam's hot → ladle into hot jars (from oven), add seals + lids, clip shut.
- Let cool undisturbed → check seals tomorrow.
- If using clip-top jars like mine, the seal isn't guaranteed shelf-stable, so I keep them in the fridge.
⚠️ Hot Jar Safety
This is very very difficult as the Jars will be roasting, you can buy jam jar tongs to help with this. If not using those be very careful using oven gloves and tea towels to not burn yourself.
Final Thoughts
This was such a great experience to be able to go forage for my own berries and make my own jam. The consistency and taste for my first time was brilliant. I have 3 small jars out to family and everyone has really enjoyed it! I will be blackberry picking every year from now on.
If you’ve never tried it, I highly recommend grabbing a container and heading out while the season lasts (late August to early October here in Ireland). There’s nothing more rewarding than tasting jam you made from berries you picked yourself.